28 ARTISTS & JOURNALISTS
their work and words, interviews, blogs, images, hints, tips, websites
and more...

Showing posts with label bookbinding. Show all posts

Friday, August 5, 2016

Playing with Papers!

Sometime back I got a variety of papers from Legion Paper, and since I love bookbinding I put them all together under one cover and bound them into a Sampler Journal...check out their Sampler Department for a dizzying array of choices for all kinds of paper needs: http://www.legionpaper.com/samples/

It's quite a big book with multiple signatures...and I left the stickers on the papers so I would remember what I was using!


I'm only partway through this book...maybe 2/3--but I decided (since I'm expecting more papers to test!) that it was time to share my impressions thus far.

As usual, I am most interested in papers that would work well in a journal, with a variety of mediums: fountain pen as well as disposables, graphite pencil, colored pencil, watercolor pencil, and of course, watercolor.

I generally enjoy a cold-press or its equivalent, but sometimes hot press and a bit of rough as well.  I look for a pleasing surface that not only looks but FEELS good with these varied choices--I prefer a tough surface that will take some punishment, too.  It's a lot to expect from a paper, but some of these really stand out.  I'll be ordering more for my next bookbinding marathon!

Some of these papers are not meant for watercolor, but pleased me mightily by working just fine for that medium.  Loved them...

Other papers are lovely for the purpose for which they were intended, but for the way I work, not so much.  A soft surface drives me crazy with its tendency to drag both pens and pencil points, as well as absorbing watercolor too readily.  I think they're likely perfect for printmaking, but not for my needs.

So...here are my findings so far, in no particular order or ranking--they're just how the ended up bound into the book, sorry.

Saunders Waterford was quite nice with a variety of mediums...it's a watercolor paper, with a slightly soft surface but very nice with ink as well.

For some reason colors dried lighter on the Waterford than I put them down...that often happens with a paper with a lot of sizing, but this was more than I'm used to.

On the other hand, these brush tests worked beautifully on the Waterford.  I'd give it a big thumbs up and remember to mix my washes stronger.

I adore Drawing Bristol, I just do--always have.  For a variety of mediums.  WANT MORE.

I use Stonehenge a lot when I'm binding books, mostly because I love the Kraft paper tan (this isn't it though...it's darker and warmer.)  I was disappointed to find ink feathering more than I expected, so I'll be careful how I use it.

It's delightful with dry mediums. though!  Stonehenge stays in my arsenal.

Somerset Velvet--not for me.  Too soft, pens and colored pencils tend to drag on it. 

Arturo Cover on the other hand is wonderfully versatile!  LOTS of thumbs up, and I definitely want more.

I really didn't expect the Arturo Cover to work this well with juicy watercolor, but it performed like a champ.  Love!

More Somerset Velvet.  Nope.  Not for me.  Way too soft.

I had three weights of Multimedia Aquarelle and loved all three!  Great, bright, strong paper, handled pretty much any medium I threw at it, including a fine pen.

This is the lightweight 90 lb. Multimedia Aquarelle...I deliberately made a wet, juicy wash to see how much it would buckle.  Absolutely minimal!  The thinner, lighter paper would allow more pages and more signatures in a journal.  Thumbs up!

Yep, I'm in love...brush testing on this page, pleased with how true the colors remained, too.

MORE Multimedia Aquarelle.  Must.  Have.  Gorgeous stuff, and truly multi-media.

Folio, nope.  Probably as its name suggests, a printing paper.  It took pen okay but not all that exciting.

Folio is definitely NOT pleasing with watercolor, the wet pigment soaks in and looks gray.

Lanaquarelle, on the other hand--YUM.  Same colors on this paper as on the Folio were much more vivid.

Lovely with all these mediums, too.  Ordering more...

Ink wanted to feather on the Folio, especially if the pen writes rather wet/juicy.

Sorbet text is quite lightweight, and comes in rich color...fun for light washes, a dryish application of gouache, or colored pencil, though.

This is Arches Cover, not their watercolor paper, but--I wasn't thrilled with it for ink, either, it felt a bit soft.  (But then I don't like their watercolor paper...)  It DID work well with a different pen, and as always that makes a huge difference.


Again, ink wants to feather some on Coventry Rag...not high on my list.

So overall, for me...not Arches Cover, Coventry Rag, Folio, or Somerset Velvet, but the others have definite possibilities for my artist's-journal keeping self!  (As they say, YMMV.)

----------------------------------------

And this from Legion Paper's website...they're good folks and very helpful:


"It is our mission to continue to travel the world in search of the most intriguing and best performing papers - from delicate handmade papers that reveal striking texture and color with every sheet to the most technologically advanced digital printing papers produced today.

Following [on their page] are just some of the mills that we represent.  In addition to these, we have over 40 other mills all over the world with whom we work on a regular basis to have papers made to our, and our customers', specifications."

If any of these interest you as much as they did me, go to the Legion Paper link, above, and then to the specific paper you want to know more about.  On each paper's page there's a "where to buy" link in the bottom right hand corner!

Going there now...wheeee!
(And yes, this is on my personal blog as well...wanted to share with you, too!)

Wednesday, July 8, 2015

What I've Been Up To, or How I Got a Bunch of "Strangers" To Make a Book

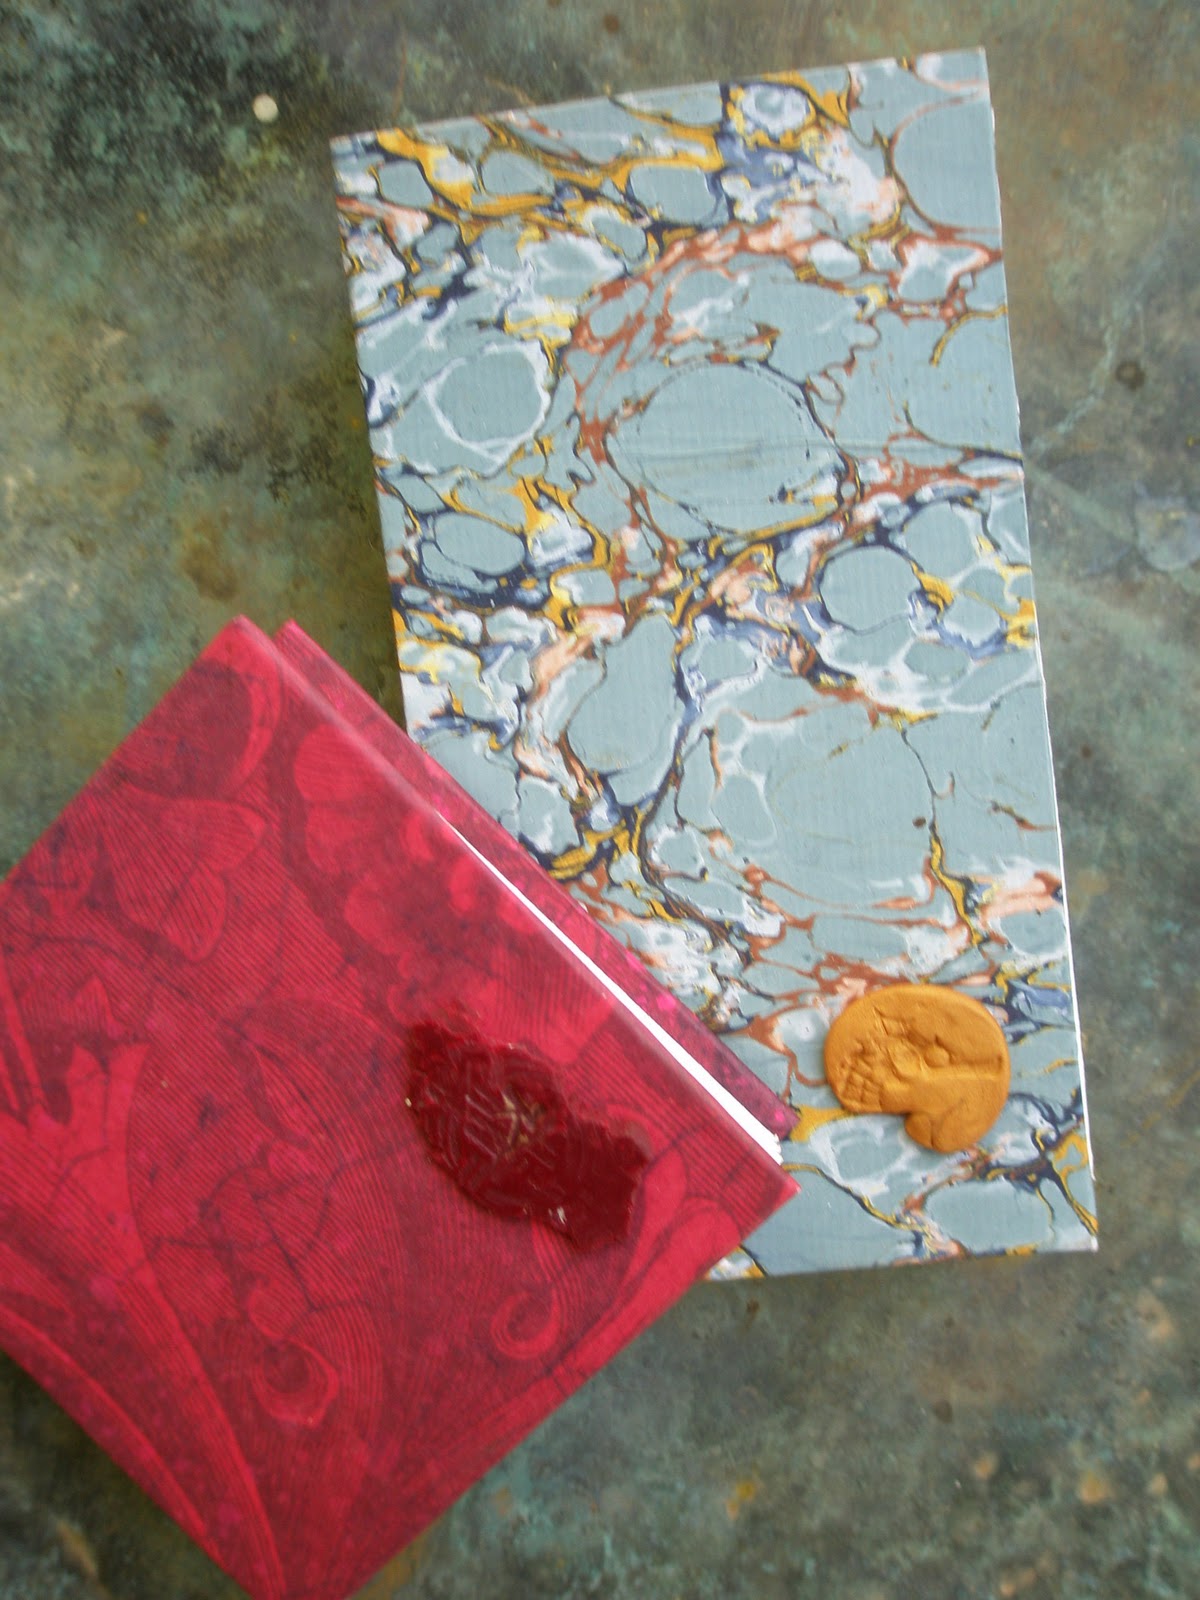
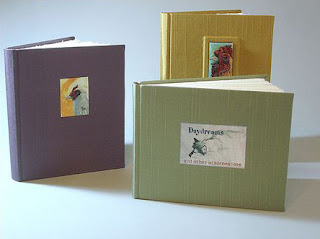
Some examples of simple round back spine journals. 
A couple months ago I offered my first online bookmaking class. People have been asking me to do an online bookbinding class for years, but I've always pooh-poohed the notion.

I would tell people, "I like to be hands on." Or I would say "I like to see the students' faces when I explain things, so I can see if they don't get something."

All those things are still true, but a shoulder injury which made it impossible for me to lug my "portable" binding studio around finally convinced me I should give it a go.

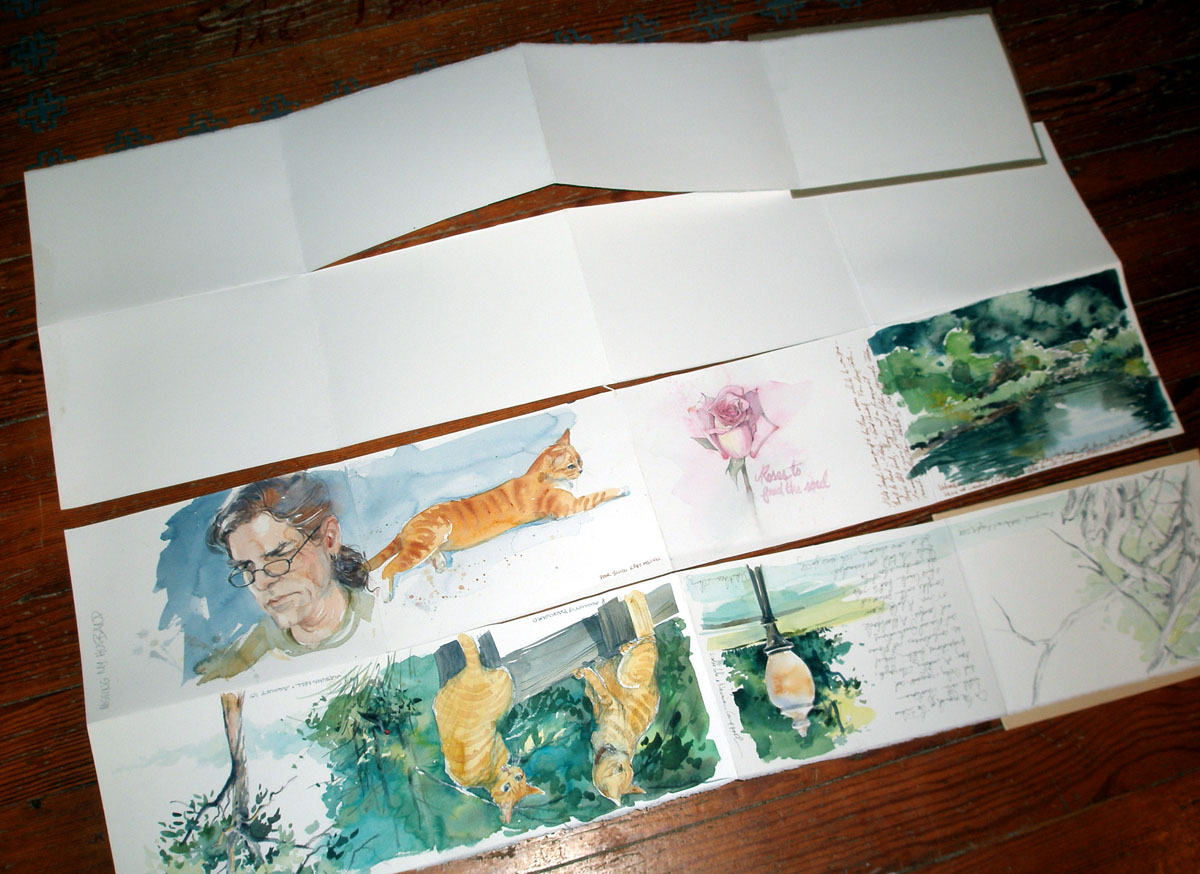
So I started with what I think is an elegant and useful book for visual journal keepers (because of course that's most of the people I know). I taught my simplified version of the round back spine. I required specific papers and materials—so that if something went awry for someone, I knew I had controlled as many variables as possible and I would be able to help them "remotely," instead of in person.

And then I made a LOT of videos. (Over five and a half hours of videos.)

One of the great things about the videos is that everyone could see equally well every step of the process. The one downside to teaching in person is that when I demonstrate there are usually 12 people in a class, huddled all around me, vying for a good vantage point. And often there is only one opportunity to watch me do something. And I push people really hard in class because I want to get them over the idea of "perfect" and instead focus on the idea of process and the whole. (I'm bossy.)

With online classes people can watch the videos over and over and the videos include so many close-ups that this is one aspect of online that's actually better than being there in person.

Of course I spent so much effort on making the videos to the point and tightly edited, that what was missing, when I sat back and watched it all was obvious—all those lengthy digressions (some of which are humorous) I'm known for. (In fact one of my pre-release testers made this actual comment since she'd taken the class with me in person.)

So I made some more videos to capture some of those digressions.

And yes people don't get to see how "funny" I am in person, but I even addressed that by having 4 live webinars where students got to see me answer their questions in real time and be impromptu and a little goofy.

Since I had no idea how to "manage" my time involvement—I seem constitutionally unable to not respond to student questions—I limited my involvement to the first month. Then I set about popping in daily and answering questions as they came up, so people could keep working.

This worked great because some students dove right in and had a book finished before the first weekend was up, while other students did each of the steps in a slightly more spaced out fashion in between the demands of their lives. That second group were able to benefit from the questions asked by the first group of students.

By the end of the first few days I realized that yes I can get across all the important points through video. It would have been nice to stand next to a couple people who were tearing paper and having problems, but I've been doing this for so long that I had lots of suggestions for them and they all reported improvement after trying different things.

That was actually the best thing about the class, the students were great. They asked great questions, they supportively commented on their fellow students' work, and they jumped right in and got their books made. And I felt comfortable working with them, because I got to do what I love to do—answer questions and teach people how to make books that they can actually use to meet their needs and they way they work.

I enjoyed the process so much that I immediately started shooting videos for 4 more book structure classes and a drawing class. As you can imagine, it takes quite a lot of time to shoot and then edit video. This is a bit frustrating for someone who writes as quickly as I do. When preparing for an in-person class I could write a handout, do a sample in the days before class to remind myself of the process' quirks so I'd be sure to mention them all, and then start packing and shifting stuff.

I guess I can live without the packing and hauling of stuff! And now I know that there are people all over who right now are working on their July book. I told them I wanted them to make a book a month for the year, to really train their minds and hands to do this process. They know I can check on them!

I have been asked when I might offer this class again. I wish I could give a concrete date. I want to release a couple other classes first because 1. I like to do new things, and 2. I want to see which types of classes are most popular. I have well over 75 classes that I'd like to translate to video, if the classes prove popular online. But as with any new venture you need to see what people like and don't.

I only teach one way, however, and that's with involvement and precision. So far the students have told me they liked it. One particularly inquisitive and delightful student told me it was like having a daily conversation with Roz—well for him it was, because he asked a lot of great questions.

My production schedule has been disrupted a couple times in the past few months as my 93-year-old father-in-law has gone in and out of hospital. He's frail, and now totally forgetful, but he has some great days. And he is very interested in what I'm teaching online.

"How can you even teach drawing online?" he asked, when I told him I had started putting together a drawing class for online.

I looked at him for a moment and considered how I could explain it. I've been teaching binding and art classes for over 25 years and it's just something I do, like paint in my journal. It seems natural to me. Teaching is something I've always done. So how could I give him a concise expression of the process of teaching a subject he has never dabbled in?

But it was immediately obvious to me. He's an engineer. I've lived my entire life with engineers (or scientists and process-oriented artists).

"You know when you were first learning to be an engineer you had to learn first principles?"

"Yep."

"Well there are those for artists as well. And a new vocabulary, just like engineering. And there are processes, which you can break down and explain so that people understand how to run a problem independently."

His eyes lit up. He knows all about learning something so well that he can improvise and create. He did it his entire life as an engineer and on his best days he still sits down at his computer and works on his pet projects.

"Well that's worth doing," he said.

And I nodded. I believe it is.

Right now I'm looking forward to the launch of "Drawing Practice: Drawing Live Subjects in Public." It's based on a couple Drawing Practice classes I've done in person over the years. However, when I started doing the videos it became something much richer. Things that were normally one minute asides in class, discussed quickly before we pushed on to some "have to get done task," became their own entity. It was a fun experience to see this happen.

The class deals with five things I believe are critical in developing one's drawing skills for live subjects—daily practice, habit building, understanding fundamentals so well you can improvise, actually getting out in public, and dealing with one's internal critic. The class starts on July 24, 2015. There are new lessons every Tuesday and Friday through August 22. (Students have access to the videos and course materials for a year.)

I will probably offer this class again sometime in 2016, but am not sure of the schedule. Right now I plan to post another book structure class, a visual journaling class, and repeat "Simple Round Back Spine," first. People are always asking if I'll teach a gouache class and a color theory class—yes, and yes. But they won't be ready at least until the fall of 2016 or later.

If you're interested in taking online classes with me you can go to my blog Roz Wound Up. There you can see a "Classes with Roz" image in the left-hand column. (If you click on it you'll go to a page about the most current class.) Just below that image is a sign up form. If you sign up there you'll be fed automatically to my class mailing list and receive promotions that way.

Alternately you can go to my blog and scroll down the left column to the Category list and click on Classes. OR you can scroll down a bit more to PAGES and find the pages that say "Classes…" and click on one that appeals to you.

There are a lot of things that I'm still coming to grips with in online teaching: where to store all this video "footage" for one thing! But as with the other teaching I've done in my life, it has introduced me to interesting and creative people who want to learn. These students push me to think about my process in a meaningful way. I am grateful for that.


Thursday, June 4, 2015

beginning a new hand-bound journal


With my previous post, my journal was filled and I have begun a new one. For this one, I cut sample sheets of Bockingford tinted papers in half, then bound them into an antique book cover. The end sheets are made from a sheet of Saunders Waterford --- I often skip using separate paper for end papers, choosing to use watercolor paper here as well since it is usually drawn on.


Inside the front cover, I glued the front illustration from the original book. The old book block was bug-chewed and crumbling but I wanted to save this bit. As usual, a palette on the first page: this one, a pocket palette made from a business card case filled with earthy, granulating paints. I will fill in personal contact info after posting this, in case the book is lost.

Wednesday, May 27, 2015

binding sample journals


Reading through comments on a recent post by my dear friend Kate (aka Cathy Johnson), I remembered a pack of sample watercolor papers purchased several years ago from Legion Paper. Kate mentioned binding a journal of a similar sampler pack.

Nearing the end of this journal, I've been considering buying more paper to bind a few more. But why not use what I have? First I cut the Bockingford tinted samples in half to make a smaller purse-size journal. Then I used most of the other sample sheets as-is, folding once to form signatures.

I checked in the old steamer trunk that holds my bookbinding materials for cover boards, planning on binding both of these with an open spine & Coptic stitch. But I found these two book covers, bug-chewed text blogs removed, that were rescued from a discard pile at a library sale years ago. Totally unexpected, BOTH of them fit the signatures I just made! The only adjustment needed was to remove two papers from the larger set, since the original book was rather thin. With the title "Near to Nature's Heart", the small book may be dedicated to nature sketches.


After cutting and folding new signatures, I leave them under this weight (an antique iron from Bill's grandmother) a few days before sewing. It helps the paper hold it's new shape.

Friday, June 20, 2014

Another Simple Journal, Double-Pamphlet Style--from Shirley Levine!

P1270094.size.jpg

Our dear friend Shirley Levine of the Paper and Threads blog has give permission to share her terrific blog post on making a simple, fast, lightweight journal--thank you, Shirley!

P1270069.size.jpg

As always, her instructions and visuals are clear and easy to follow...now I'm wanting to make one like this!  You can find the full post here: 
http://www.paperandthreads.com/2014/06/making_a_simple_sketchbook_the.php

And lots more from Shirley on bookbinding here: http://www.paperandthreads.com/2012/02/watercolor_sketchbook_tutorial.php

What a treasure she is!

Sunday, May 18, 2014

More on Bookbinding from our friend Shirley!

WCSketchbooks.size.jpg

Former student Shirley Hememd got the bookbinding bug and has sone some amazing work!  Check her blog post for tons of inspiration, and let her know in a comment if you'd like to see more like this.  She's done some adventurous work!

http://www.paperandthreads.com/2014/05/making_watercolor_sketchbooks_2.php

Thursday, May 1, 2014

Quick Sketching in Color


This is a little video I did for my Quick Sketching in Color mini-class...it's been private for just my students until now, but I decided to share it with you!

It's my quick and easy accordion journal I carry in my vehicle for sketching wherever I am.  I'm not much on shopping, so I do a LOT of "parking lot sketches" while Joseph does our business.

Sometimes I can add color on the spot, sometimes I exercise my color memory and do it later...that's what I did for this demo!  Either way works, it's your journal!

Check out the class info, here: http://cathyjohnson.info/sketchingincolor.html 

(By the way there are TWELVE videos in that class!  Not bad for 4 lessons...)

More on a different kind of quick and easy journal here on YouTube, or see my CD, here.  It includes both these types, plus ring-bound, book cloth, making covers and more!

Sunday, March 31, 2013

Inspired to Try....

A while back on FB, Jamie Williams Grossman posted about the book she was working in.  An 8 x 10 inch, 16 page book made from one sheet of watercolor paper!!!

Of course there were many questions in the comments about how????  Jamie was very sharing and gave the website address for the directions and also mentioned that it could be fashioned smaller using a half a sheet. It would be approximately  5 x 7 inches.  Now, that's my favorite working size.  I must do this!

Here is the link Jamie gave:

This is my 5 x 7 adaptation and below I've provided directions on making a basic book.  The sky is the limit for what you do with it :)
I painted the cover, page borders, splatters and marsh images with FW Acrylic Inks.

Please click to enlarge images.  This book has 16 paintable surfaces.

You'll want to use Fabriano 140# watercolor paper as it doesn't crack when folded. I tore my sheets so I could get an uneven edge. I use hot press as I like writing on the smooth surface.

Your book will be as precise as your folds.  Take your time and you'll be happy.  I practiced on  a 15" x 22" sheet of drawing paper.  I'm glad I did!

Happy journal making!


Wednesday, November 9, 2011

Keeping busy...

We got a big order for one of the little history books we publish, so J. spent the weekend binding books!  I had stuck the sitcker from our red bell pepper onto that page, so just played a little having the other colors harmonize!

Taking care of health concerns; J. had a couple of moles frozen off a few weeks ago, and has a couple of others to remove surgically.  This was the first one...and hooray, it was benign!

The doctor thought it was interesting that I sketch about everything...but he was a good sport about it, and let me stay in the room.  Good thing it was minor!

Saturday, September 10, 2011

where the fun begins . . .

where the fun begins . . . by vickylw
where the fun begins . . ., a photo by vickylw on Flickr.
Finally finished binding some new art journals this week. I've actually felt a bit "lost" not having one to grab and sketch in.

The two upper ones are Coptic stitched, both having a heavier 140 # watercolor paper in them which holds up well with this open binding.

The lower left one contains nideggen paper, a print paper I've always wanted to try. Because it is so much thinner, I also added some pages of Fabriano Tiziano toned paper --- scraps of both were used to bind the mini journal.

The landscape oriented journal is Fabriano 90 # soft press --- a paper I love but it's grain runs opposite, so I bind it in this format to get the most pages out of a sheet of paper.

I found some cardstock stickers at Hobby Lobby to stick to the fronts, making it easy to tell front from back. But some actually covers goofs --- The cover paper was from a Daniel Smith sale and was a bit thin, showing glue spots in places. The upper part of the tan bookcloth stained as well, perhaps from the green paper's dye running. Maybe it gives the book character??

Wednesday, July 27, 2011

Chain or Coptic stitch link!

I've not made any journals of this type, but this demo is SO well done I may just try:


http://www.tortagialla.com/2010/08/16/chain-or-coptic-stitch-bookbinding-tutorial/

Great stuff...I'll be adding it to Links We Like in our sidebar!

Friday, February 18, 2011

Got new journals bound...


We all seem to be of two minds about a brand new, pristine journal, especially a handbound one!  Since I make my own, it may be a tiny bit less of an issue, but sometimes we're a little intimidated by that First Blank Page.  Clean, snowy paper.  Full of possibilites...full of.....................blank paper!

What do YOU do to get past that fear of white paper?  I wrote a whole article about that once, and if I can find it, I'll post it!

You saw Fred Crowley's opening page last week; Liz Steel often sketches her current paint set as a first page...if you've got a tradition like that, go for it! 

Add a quote you like, and illustrate it. 

Draw the first thing that comes to mind.

Or skip a few pages, and let the journal itself tell you what to put there.

Do be sure to add contact info either in the front or back of your journal so it can be returned to you if lost.  I know several people who have been VERY glad they did that.

Personally?  I'm excited about having all these choices, now, and can't wait to finish the last three pages in the one I'm using!

Monday, January 10, 2011

Jana Bouc on making your own journal


The other day I'd asked our friend the talented Jana Bouc if she minded if I linked to her journal-making posts and other information, and she told me she was JUST reworking all that.  

I heard from her over the weekend!  She wrote "The journal came out nicely and is posted today on my blog and the how to sheet is updated on my website here ."

I'll put the links up in our list in the sidebar, but thought you'd like to see them NOW.

Thank you, Jana, this is wonderful!

Friday, December 31, 2010

Super-simple handmade journals

A lot of people have mentioned to me over the years that they'd love to bind their own journals but it's just too complicated or time consuming--or intimidating!  I'll never be a "real" bookbinder, but I do enjoy making a variety of sketch journals so I can have the paper I want.

I'd love to take a bookbinding class, maybe one of Roz Stendahl's, but so far I use books and DVDs as my guide... this Dover book by Aldren Watson was my first and still my favorite. Hand Bookbinding: A Manual of Instruction.

But if you're not up for case-bound or other traditional methods, here are a couple of VERY easy journal types to start with, if you just want good paper to work on...

ACCORDION FOLD


You may have seen this type available in the online catalogs...it's a simple accordion style.  You just cut a strip of paper the height you want, fold in the middle of the strip, fold again, and again, zigzag style, till you get to the size you want.

You can glue book boards, cardboard, matboard or whatever, to each end to protect the edges and make it more book-like.  I make these fairly small and have one in both of our vehicles in case I go off without a sketchbook!


They can be quite handsome, as you see above.  (I sometimes add a little bit of embellishment so I can tell which end is the "front."

I often do more traditional bound books, but because I like a square format there's always some waste of a full sheet of paper.  I use that to make these small folders.


Granted, these ARE a bit more difficult to use sometimes...they want to unfold unless you have a nice flat place to work!  I did the ocean part of the folder above balancing the paper on my knees and fighting the wind!  I like the way you can continue an image across the pages, though...

Of course when you get to the end you just flip it over and fill the other side.

Single page FOLDERS


These are a bit more difficult to describe, so I did this little YouTube video to explain how they work.  You can use a full sheet of watercolor paper if you like, that's what I did above!


* Nina Johannson, one of our correspondents, did a wonderful post on her blog on this folding technique, which she found and sent me, HERE.  It's clear and beautifully photographed, thank you Nina, I'll add it to our links!

There are lots of other options, of course--I covered these in more detail in the CD I did on Super-Simple bookbinding.  You can find it in the bookbinding links at right if you'd like more information.

And I just realized as I was looking for the Aldren Watson book above that you might like to see this, as well--Bookbinding resources and supplies on Amazon!  I hadn't even thought about being able to get needles, binding thread, bookcloth, glue and more there...
Related Posts Plugin for WordPress, Blogger...