28 ARTISTS & JOURNALISTS
their work and words, interviews, blogs, images, hints, tips, websites
and more...

Showing posts with label watercolor. Show all posts

Saturday, June 9, 2018

Repurposed Prang Box, 10 years later


If you've been with me for a while, you may remember this repurposed Prang watercolor box, from the 1950s--when the boxes were still metal rather than plastic!  I took out the kids' paints and replaced them with larger pans of professional colors I actually like...

The photo is from 2008, so I've been using this little jewel for 10 years...I have carried it from Missouri to California to Nevada, and love using it...it makes me feel like a kid again!  That's the one in our banner here, too.


These are the colors I added then, or close to it...there's an orange in there, too, in place of one of the yellows!

Actually, I have a couple of them...one with Old Faithful, the Yellowstone geyser on it, as well as this somewhat newer one...I found them on eBay, and a quick check showed you can still find them there.

The pan of kids' colors pops right out...

I stuck empty full pans in with rubber cement, so they're easy to pull out and replace if I want...and then filled with my own choice of colors.

Well.  That was then, this is now.  10 years, many miles, and a whole lot of sketches later!

The mixing area has gotten rusty and I may sand and repaint it...or not.  Some colors have been replaced.  I added a few half pans for more versatility...Manganese Blue Hue, Indigo, Quinacridone Burnt Scarlet, and Quinacridone Gold...
As you can see, it's been well used and well loved, and will continue to be so.  (And yes, I cleaned it up some for its photo op.  Really I did!)  At 4.9 ounces, it's my heaviest travel kit, but sometimes you just have to deal with it!  Worth it, to feel like a kid and give yourself permission for whimsy...

On a beach in California...

Friday, June 8, 2018

Lighten Up!

I find that over and over I try to simplify my gear and lighten my load--and since I want to be prepared for almost any sketching contingency, it's not that easy! 

Recently I've been exploring the fun little Pocket Palettes from Expeditionary Arts--and Maria Coryell-Martin keeps refining and offering new types, formats, and kits!  Check out her "toolkit" page at the link...

Here you see the original palette on the left and a newer model with a brushed steel case (I think she's offering a traditional black one now too, but I didn't see it on the page.)

I know it's silly, but I'll keep carrying the original shiny one because sometimes a girl just needs a mirror...or a signaling device...or...and the little bag it comes in protects the finish!

The very first ones had small pans, like those on the right in the filled palette, but many of us like to work with a larger brush, so Maria added the square pans.  Perfect! 

Tuesday, May 16, 2017

Sketchbook Review: Field Artist 4" Square Watercolor Journal

Click to enlarge
Every once in a while, I spot a new art toy that I just know is going to recharge my flagging art energies and it happened when I saw the Field Artist 4" Square Watercolor Art Journal!

I just knew I was going to love it because:

  • It's small. At only four inches, it fits in the palm of my hand when closed. 
  • It's square. I've been having a love affair with squares for many long years and I am almost always captivated by something squared, especially if it is not usually found in that shape!
  • It's a watercolor journal and that always makes me happy. 
Upon receiving the art journal from Amazon (no affiliate links), I immediately pulled out my stamps and embossing powder and decorated the front cover. The journal does have an elastic band to keep it closed that cannot be seen in the image. 

While I adore the effect, I don't recommend doing this as the embossing is not holding up well. My journals are well traveled. They go everywhere I do and that means they typically tumble around in whatever bag I am carrying. The cover itself is a "PU leather-like fabric" and is holding up just fine. It's the embossing I added that is not. 

My first piece of art is on the inside of the cover. The paper used as the endpaper is not the same as the journal pages. It's much lighter in weight so I opted to use markers to create my design. The paper didn't hold up well even under marker so I caution you about using any kind of wet media on it.  

The endpaper on the inside right sports the sketchbook branding and is oriented so that the logo only reads correctly when the book is opened top to bottom with the fold of the journal above the logo. You can also see the yellow ribbon page marker in the image below. 

I'm thinking I'm going to be gluing an additional piece of watercolor paper over the branding page and using the space as a place to put my "if lost, please return" info:

Eventually, I worked my way to my first page. Since the book is small and I knew I wanted it to record "everyday adventures" that seemed to fit as the title page as well as the theme. I think we often have far many more adventures than we realize. It takes paying attention to notice them though. 

Those adventures can be as simple as having to take a detour due to construction and seeing something new or it may be notice a pretty bloom on your way to the mail box (even if it's a weed!). 

By elevating the ordinary by paying attention, we can make it extraordinary!

The page has ink from a Faber-Castell Artist PITT Pen as well as watercolors on it. There was no bleed through from the pen or paint. The pen performed very well on the paper with no skipping or bulking. 

There is a slight textural difference between the two sides of the pages and they don't always match up. Sometimes you have two different textures across a spread. There doesn't seem to be a pattern to where the difference will show and where it will not. It's slight enough that it can be ignored even if it is visible. 

I found the time to capture a family of wrens that have been visiting our backyard in the evenings. The babies had just fledged and were a little clumsy the first time we spotted them. Four days later and the only way to tell the parents from the babies was the fact that the babies were still following mom and dad around with their mouths open waiting to be fed!

There is a stamp in the upper corner that did not bleed through to the other side even when I painted over the stamped area. Again, pen and watercolor were used in the piece.

One last little surprise was the long accordion-fold, panorama page that is attached in the very back of the book in place of a pocket. It is four panels wide, but the fourth panel is partially glued to the back cover giving you only three panels to be painted on the back. I have to admit a pocket at less than four inches in width probably wouldn't have been very useful! 

The paper is marketed under the Chinese brand, Image. I was not able to find further information on the maker or the paper. 

So here are my pros on this adorable little journal:
  • It's small and very portable. 
  • The size is perfect for capturing a quick sketch. 
  • The paper is acid-free and dries flat without having to be weighted or dried with a blow dryer. 
  • The paper has hard sizing which makes it very forgiving when you want to pick up paint to get back to the white of the paper. 
  • It lies flat making it easy to work across the spread. 

My cons:
  • The sketchbook is very small and it takes some adjusting to getting used to working in it. It's hard to rest the heel of your hand on the page and draw at the same time! It is not difficult to adjust to the size challenges, but I'm thinking folks with big hands would really be challenged. 
  • The paper is not archival. Chances are good it is made from wood pulp instead of cotton or linen and they have removed the acids. However, this is not a deal breaker for me as I'm using this to play in rather than creating works I expect to wind up in a museum!
  • The paper has a hard sizing which makes it way too easy to lift color unexpectedly and it seems to take a bit longer to dry than other papers. While I put this down as a con because speed is important to working on location, it's not a huge problem. It just means I need to alter my approach a bit to fit with the paper of the journal.  
  • The fact that the paper textures do not match up across the pages. It's a minor thing to fix and because it wasn't, it speaks to rather shoddy workmanship or a lack of pride in their journals, especially given the last point... 
  • For the size, I find it a bit pricey at $12.95 (I guess we're paying for that extra dose of cuteness!).
So far, I've been very pleased with the journal and I've thoroughly enjoyed using it! I look forward to finding more little everyday adventures to record on its pages!

What new art toys have you found lately?

Saturday, August 22, 2015

First Street Alley


First Street Alley
©2015 Steve Penberthy
Watercolor on Strathmore Gemini 140-lb CP paper
in handmade sketchbook,
6.75" x 10.25" (17 x 26 cm)

Friday, August 21, 2015

Morning at the Lake


Morning at the Lake
©2015 Steve Penberthy
Watercolor on Strathmore Gemini 140-lb paper in handmade sketchbook, 
6.75" x 10.25" (17 x 26 cm)

I painted this sketch in my handmade sketchbook containing my favorite watercolor paper, Strathmore Gemini 140-lb CP.  It has the right amount of sizing that works for my style.

More info about my handmade sketchbook.

Friday, August 22, 2014

Journaling as a Healing Tool

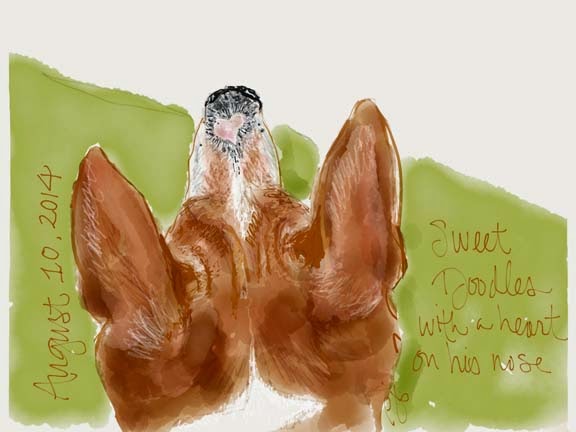
For all of you with furry friends..... Life with them is great, but as they age... well, the ending is always gut wrenching.

This is how it has been at our house for the last few months: vet trips, new meds, different food, pee trips in the wee hours of the morning.... I'm sure you've been there.

I've been sketching a lot of our two dogs over the last year.  Some with traditional tools, some on my iPad using Paper by 53.

This past weekend the serious 'Goodbye' page started taking shape. One thing about our Dudley, he was all about showing you things you'd not have seen without him.  Sunday morning as he and I walked down the street at 5:15 a.m. was one of those instances.  This was the last Sunday we'd be together, and the early morning sky was just beautiful.  Later that day, I did the above memory sketch as a tribute to all those wee hour pee trip walks we've taken over the last several months.

Yesterday was our 'goodbye' day.  I came home and immediately went into my studio and studied the right blank side if the page.  I had decided on tribute phrase... but what else?  I knew I'd just have to take my time and the right things would come.  Later, we sat on the sofa and looked at old photos of our pups.  Oh that was fun and heart warming.  I found one portrait of Dudley that I wanted to put underneath the phrase.  Then, during a discussion with my husband, I said the words that are now on the bottom right corner.

You just never know what will find it's way to you for your page..... The journey of journaling - can't beat it!

As for our Sweet Dudley.... he's in a much better place, free of his earthly troubles.  Now all our loving is surrounding our Grizz to help her through the grief.... 15.5 years is a long time!
Main page: Stillman & Birn Alpha journal • watercolors • micron pen

Thursday, May 1, 2014

Quick Sketching in Color


This is a little video I did for my Quick Sketching in Color mini-class...it's been private for just my students until now, but I decided to share it with you!

It's my quick and easy accordion journal I carry in my vehicle for sketching wherever I am.  I'm not much on shopping, so I do a LOT of "parking lot sketches" while Joseph does our business.

Sometimes I can add color on the spot, sometimes I exercise my color memory and do it later...that's what I did for this demo!  Either way works, it's your journal!

Check out the class info, here: http://cathyjohnson.info/sketchingincolor.html 

(By the way there are TWELVE videos in that class!  Not bad for 4 lessons...)

More on a different kind of quick and easy journal here on YouTube, or see my CD, here.  It includes both these types, plus ring-bound, book cloth, making covers and more!

Thursday, April 11, 2013

New Classes at ImaginaryTrips.com!

©1997 Alaskan Sketchbook Cover
Laure Ferlita
Watercolor
11.5" x 5.5"

Game On! Or maybe I should say "Schedule Up!"

I have posted the 2013 Imaginary Trips Schedule and you can find it here! New trips and visits are planned as well as some prior destinations that you might have missed the first time around. For those of you waiting for the Independent Learning Classes (or should I say still waiting), that is my first priority for 2013. The first of the ILCs will be posted by the end of April!

I have to tell you I'm pretty excited about the first class on the schedule for this year, An Imaginary Visit to A Past Vacation! (Please click the title for more information.)

If you're anything like me, you've probably taken at least one vacation in your life before you started to sketch or before you became comfortable sketching around others. Or maybe you've taken one recently, but the trip was so fast-paced you didn't getting any sketching done.

Take a look at the sketch at the top of this post...you'll note the copyright date is 1997! And that's when I completed the sketch from my trip to Alaska...from 1996! It also happens to be the only sketch I completed from that trip despite my well-thought-out plans.

Is that just not sad? That was a fabulous trip! I made the sketchbook, I gathered my materials and I painted the cover. What happened to everything else, all those other great pages dancing in my head?

Somewhere along the way life got busy and interfered with my well-thought-out plans. I have no sketches for that trip other than the cover. The horror! You know they say about "good intentions," right?

I decided to correct this huge oversight and it started me thinking about the trip and all the stuff I didn't remember. (Oh, come on, it was nearly 20 years ago! Surely you don't think I can remember it that well!)

How could I go about reconstructing my trip so that I had a sketchbook that was worthy of this great trip when I CRS (can't remember stuff)?

This experience lead me to put together the class and to share it with others who might have done something similar. So if you're one of those people—just like me—that have lots of good intentions but no sketchbooks, come join me!

Please check out the new schedule for a "trip" or a "visit" as we're going to some fun new places as well as revisiting some of the prior places we've visited.

Wednesday, February 20, 2013

Correcting Lettering Mistakes

A lot of times I'll wait until I get home before adding lettering to a journal page. Mainly because of time and comfort. But on this particular day, I felt quite comfy perched on my camp stool and the 8.5 x 11 journal page in my Stillman and Birn Alpha hardbound journal was such a dream to work on.

However, on the way home, I began to wonder if this really was Harbour Town's Liberty Oak. There were two very large oaks in the heart of Harbour Town.  The magnificence of this tree, with it's sprawling low lying branches surely struck me as the one to bear this name...... Not!

Long ago, a skilled calligrapher taught me how to correct mistakes... Tip: correct your mistake before you lift any unwanted lettering.  Huh? Yes, write over the lettering on the page, then white out or lift off what you don't want.
That way the stroke of the corrected lettering will be smooth and you won't have to contend with the often bumpy texture left by white out or white ink.  I used a Signo Uniball broad tip white pen, available from JetPens.com.

I decided to turn Liberty Oak into Live Oak.  The RTY of Liberty would be taken out.  A good size space would be left between the two words.  I decided to put the tree's Latin name between Live and Oak.... a quirky fix, but it worked for me :)

Since this is a journal page and not a piece of calligraphic art, I was willing to live with a bumpy surface to write the smaller replacement text on.


Monday, January 21, 2013

Journal Page Tutorial

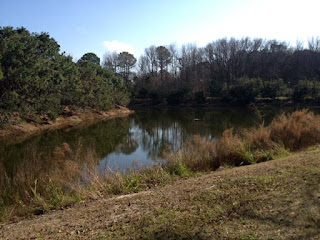
Last week, we had some unusually warm weather in the lowcountry of South Carolina.  We took advantage by taking our bikes to Pinckney Island National Wildlife Refuge. Our first stop was Nini Chapin Pond. It's roughly two miles from the parking area. There was not much bird activity, but we found some shade and it was a good time to eat our lunch.

This was the view we looked upon.  There was a small group of Buffleheads feeding in the water.  I loved how their dives caused the olive green water to shimmer with the blue of the sky.

Viewing the scene for a few minutes is a great way to narrow down what really catches my eye, helping me to decide  what to record in the journal.

The next page in my Stillman and Birn journal, that I've devoted to water scenes, was the right side of a spread.  I didn't want to fill the entire page with a sketch so decided upon a smaller vertical image.
Click to enlarge

The first thing I did was to secure a piece of foam core to the right side of the back of the journal.  This made a great surface to hold the palette and less of a balancing act for me.

Next, I drew the vertical shape that would hold the watercolor sketch. Then added pertinent information for the day: date, time, temperature, where we were, and around the edge of the box, I started adding notes about any wildlife that crossed our path.


To me, the lightest color in the scene was the blue of the sky and water.
I knew that if I let most of the paper show through on the lower right corner, I'd stand half a chance at keeping the true color to the foreground grasses.

click to enlarge


Hopefully you can see the first layer of blue!


 Now you can see the first layers of green water and the brown of the far shore's bank.  While painting, the Buffleheads were diving away, always changing what the water looked like.

When painting plein air, light and water are ever changing.  Once I've laid down the initial frame work of colors, I take a good look at the direction of the shadows. I will have to paint from memory in order to make the painting read true. 
All that was left to do was to add notes of any other wildlife that we saw after heading over to the other side of the pond.


Final page, scanned.....


Thursday, August 2, 2012

Sometimes, You Have To Outsmart Yourself! (Laure Ferlita)

After returning from my trip to San Francisco, I knew I'd be adding a page of the gorgeous California Poppies I saw all over the city. I also knew I wanted them to be loose and painting loose for me is always a challenge!
Detail from Full Spread
Click to Enlarge
Since I worship at the "altar of detail," I decided to really make it difficult to paint details by painting the pages while standing up with the sketchbook turned upside down with a #10 size brush.
Detail from Full Spread
Click to Enlarge
After the pages dried, I sat down to add just a few of the details to the flowers to suggest the crinkled and wrinkled texture of their petals.
More Detail
Click to Enlarge
Adding in those few details also fed that need I have for detail work without overwhelming the flowers.
California Poppies
11 x 8.5 inches
Watercolor
Ink for the writing only
This was way fun and a little scary as I was working in my sketchbook for San Francisco and I really could have messed up, but I had a game plan in case of failure. I figured I could either glue new paper over the ruined pages or possibly gesso over these and go again. Thankfully, I didn't have to!

If you are a detail painter with a strong desire to let go of the details with no idea where how to begin, let me suggest giving this a try. Choose a large, easy, organic/natural subject so that if you get "outside of lines" it doesn't ruin anything.

Lightly sketch out your page, gather your supplies, put your book upside down on a table, stand up, and let the paint fly! (I had to leave the room while it was drying to keep from fiddling in the paint!)

The other thing that helped me was leaving all reference material in the other room out of sight. That way I didn't start trying to add in any details or shadows.

After your page dries, consider where you can add just enough detail to clarify or suggest texture. Keep in mind that less is more. Go slowly by adding in a few details and then stepping away from the work so that you can view the page with a fresh eye.

If you decide to join me in the "upside down, standing up, large brush" painting method, please let us know by leaving a comment below with a link so we can see you efforts too!
___________________________________________

I hope you'll consider joining me on "An Imaginary Trip to San Francisco!" The "trip begins on August 16th. More information is available here! Hope to see you in the Imaginary Realm!

Saturday, May 19, 2012

Fast Sketching and Building a Journal Page

Back in April, I conducted a small Around-the-Town Sketching Workshop in Beaufort, SC for Coastal Art Supply.

On the first day, we started by drawing boxes of various sizes on a page in our sketchbooks.  Then we headed outside with just our Micron pens, pencils and sketchbooks. 

My goals for the students included getting used to sketching quickly with pens, making color notes in pencil and in the end, completing their pages with color and decorative lettering.  We started filling the boxes with 30 second and 1 minute sketches.  Sometimes we splurged and stayed in one spot for 5 minutes.

After lunch we'd work in the studio and finish our morning sketches using watercolors or watercolor pencils.  Check out these results!


The second day, we approached our journal pages differently. We used multiple images to create  flowing vignettes on a single page.  I picked the subjects and showed them my methods of choosing where to position each item on the page.


This is my demonstration page.  The first item drawn was the metal palm tree sculpture on the right side of the page. I chose that spot because of the strong design of the fronds that pointed to the left - and into the center of my page.  The second element was the umbrella with the people.  Note that the shape of the umbrella points into the center of my page.  And the people are facing right, into the page. The third element was the cafe sign.  I made it a size to tie into what was already on my page.  The type was added back in the studio.  The page was screaming for a border.... type is perfect for that.

After lunch we hit the streets again with another page of boxes - they were a big hit and perfect for quick sketches.... And, what a flavor of Beaufort we captured!!


Here is the colorized version of my top b&w page:

If a blank journal page puts you off.... try a page of boxes.  They don't have to all be filled in the same day... perhaps one a day? They are perfect for the travel sketcher, or even keeping tract of your garden's growth.  The possibilities go on and on :)   Enjoy!  That's what it's all about :)

Wednesday, May 9, 2012

Recording a Favorite Event

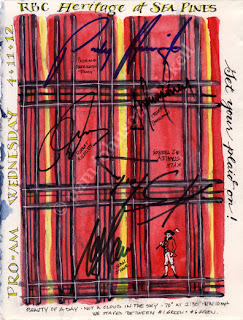
I was a tad rusty as I hadn't sketched in weeks.      The theme for our local PGA golf tournament is 'Get Your Plaid On'.... This page was a great way to warm up and it made a fun back drop for golfer's autographs :)
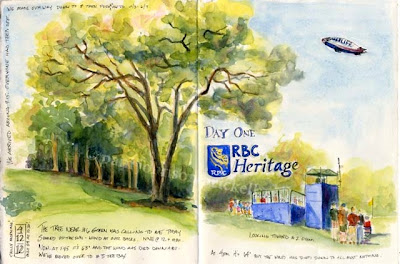
The weather was outstanding and I got to spend the days sketching.  Oh so good to be back in the saddle again!!

The official start to the tournament.  I've sketched this golf course for 4 years now. Each year I get  braver and put more people onto my pages :)
click to enlarge


Day two's and three's sketches to come in a few days.
Related Posts Plugin for WordPress, Blogger...